Last Sunday we went to Home Depot and bought the wood. We decided to go with 3/4 inch oak plywood because it's heavy enough to take the weight, it can be stained, and it didn't cost us an arm and a leg. We bought oak trim to cover the rough edged. We also bought a piece of pegboard to use as a template for drilling holes for the shelf supports. Home Depot is great because they will cut wood for you. We asked them to cut the 4x8 sheets of plywood into 11 inch strips, which is the depth of our bookcases. Their machinery was able to cut it much straighter than we could, with our limited work space and tools. Plus it made it a lot easier to transport.
After spending more time talking over each step of the process, and more measuring, we were finally able to begin. Craig drilled the holes and sanded the pieces while I was at work this week. Oh, I forgot to mention we also had to decide on a paint color for the walls because we wanted to paint before installing the bookcases. That turned out to be almost the hardest step - deciding on a paint color!
Here are a couple of pictures of the beginning. You'll have to wait a week or two to see the end result!
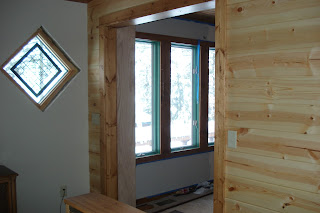
Unfortunately, I don't really have a good before picture. Here's the doorway from the family room side.
Here are the boards. Craig cut them the right length and laid them side by side. One's for the left side of the bookcase, the other's for the right. We decided not to have a back on it, so the paint color will show through the bookcase.
You can see the holes Craig drilled for the shelf supports here.
The next step was to build a box for the bottom and the top. This box helped square up the bookcase, and gave us strips to nail through when attaching it to the wall. After we had it assembled this far we carried it up and set it in place.
It took some time to get it to be level in all directions. We found out that the wall on the right was not square, so we had to take the bookcase out and shave the Sheetrock. Then we had to cut down one side of the bookcase because the floor wasn't level. But we finally got it right.
Here's the view when you're in the family room. Can you see the bookcase through the doorway?
Here's the view from the kitchen. The next step is to build a second bookcase to sit on the left side of the doorway, next to the fireplace. Then there will be a shelf running on top, all the way from the fireplace to the wall. When all the trim is on and the bookcases are stained, it's going to be awesome!


3 comments:
I can't wait to see the finished result, it is going to look awesome!
Do you think you will get rid of the bookcases in the family room then?
The built-ins will be great! We, too, are a family with tons of books!:) So... does your fireplace open to both your kitchen/dining room and to your living room?
Thanks for your comments! The fireplace only opens to the dining room/kitchen. We have a wood burning stove in the living room. I think we'll keep the bookcases in the living room, although we will have a couple more built-ins in there. We plan to put bookcases along the half wall by the stairs (behind the couch.
Post a Comment